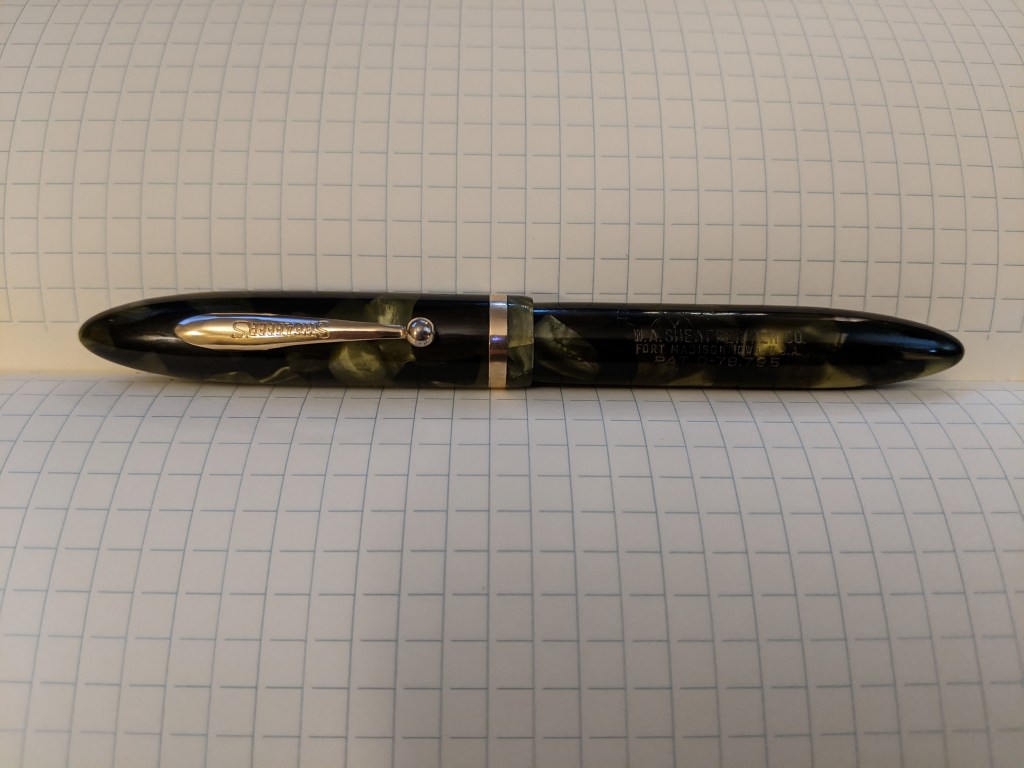
About a year ago I purchased a Sheaffer Balance from the early 1930s on eBay. From the photos I knew that it would need some work, but I wanted a fixer-upper. A previous owner had carved their initials into the body and cap of the pen, but the whole body was in otherwise good vintage condition. When the pen arrived I took some pictures:


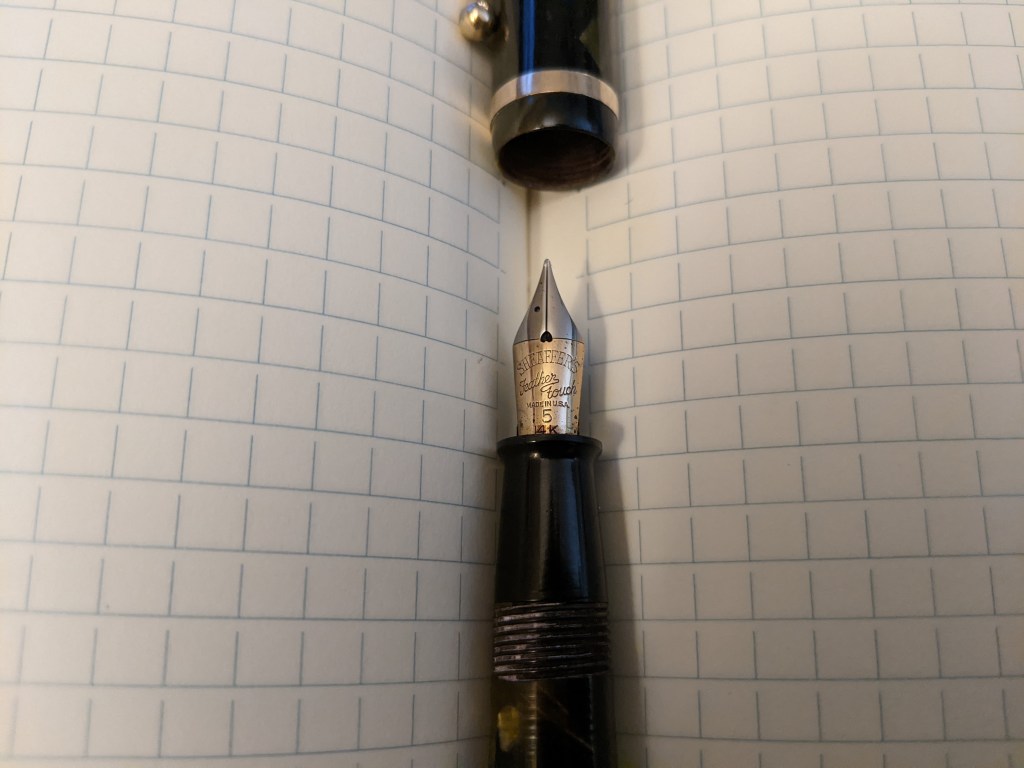
The nib really needed polishing, and I wanted to try to buff out the carved initials and shine her up. I wanted to buy a vintage pen to restore because I wanted the satisfaction of bringing a pen back from the dead. Previously I had bought a different Sheaffer model, but broke the feed because I didn’t read up on how to take apart a vintage pen. I didn’t want to mess this one up so I tried to read thoroughly about the Balance models. This particular pen is a non white dot Balance Jr. in marine green celluloid from about 1934. The nib is a 14K Feather Touch, the tip is plated with platinum and has some flex. The little breather hole in the nib is heart shaped. Here is a forum post on the history of the Balance pens. Here is another page that I read about these pens.
The Anderson Pens blog was very helpful and has an article on how to polish a pen using micro mesh. I ended up ordering all my restoration tools from them and can’t recommend their site enough! This article about pen repair don’ts from vintage pens.com was also very helpful. The Well Appointed Desk has this article about sac replacement.
After using a hairdryer on low heat to loosen any shellac that got in between where the section and body meet, I was able to take the pen apart. The ink sac had hardened and dried over time, so I picked out those pieces with these sac tweezers. After I got all the old sac out I rinsed the pen and made sure to let it dry completely before doing anything else to prevent rusting of any metal inside the pen. Then I started on polishing out the name engraving. I used a 1500 grit micro mesh pad dipped in water. I was able to mostly get the cap nice and smooth, but the body still needs work. I used 8000 grit micro mesh first, and then I used micro gloss to polish the pen to a shine.
To clean the nib I used this polishing cloth, and it works great. I was able to get all the dried ink off except for a little spot near the section. I feel very lucky that the tines aren’t splayed and are aligned.
Like a lot of vintage pens, this one is a lever filler. Inside the pen there is a pressure bar or j-bar that squeezes the sac, allowing ink to fill the sac. After I opened the pen I used a flashlight to check the pressure bar. It worked fine but I was worried that the metal might have corroded, so I resolved to get the bar out to get a better look. It took months for me to get that thing out, because I would try for a little bit and then stop for several weeks. I finally found a long pair of tweezers with a downward curved nose at an art supply store, and with those I was able to get the bar out by pushing downward and wedging it out. I ended up ordering a new pressure bar, because I didn’t want to mess with 80 year old metal. In hindsight, I wish that I had just left the original bar in because it works quite well and was already in the pen.
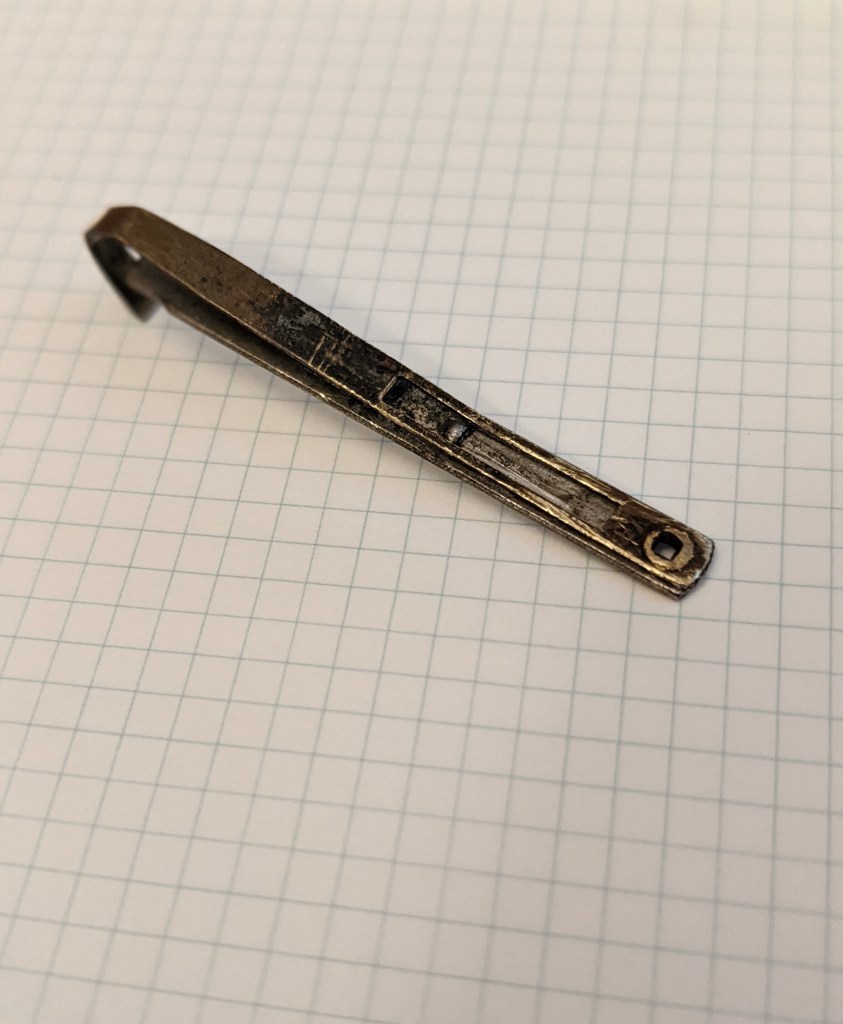
Once the new pressure bar came in the mail I made an attempt at inserting it. If you ever try to replace a pressure bar yourself, I highly recommend using a headlamp to see what you’re doing. I used my phone flashlight, but this is a two-handed operation. I got the bar in the pen and pushed it in, but it was slightly off from the lever. After trying to align the bar off and on for a few months I finally remembered that I have a headlamp. When I used it, I was able to rotate the bar with my pliers enough that it aligned with the lever. The pressure bar itself has little grooves that the teeth on the lever sit in. The bar that I bought is a simple one, and the metal is stiff compared to the original, so unfortunately I can’t compress the sac as much as if I had left the original in the pen.
Sac replacement, like any other step in the restoration process, takes patience. You can get black latex sacs or clear silicone sacs. The sacs come in several numbered sizes, so you can pick the size closest to the length of your pen and then trim it with scissors to fit. It’s important to trim the sac so that it fits flush on the section nipple.
Something that I learned late in the game is that the sac needs to be dusted with pure talc powder (not talcum), so that the pressure bar can compress the sac without friction. I purchased a different vintage pen that had been restored, but the sac hadn’t been dusted with talc powder, so the sac ended up tearing. Talcum powder will not work because the added chemicals will react with the latex and break it down. Once the sac is trimmed, I spread a little shellac on the nipple and used my fingers to try and get the sac on. After a few tries I was able to get the sac on, but I’m sure it’s much easier to use something to hold the sac open. Then the whole section needs to sit and dry for 24 hours before putting the pen back together. Now it’s time to dust the sac with talc! I did this outside with gloves and a mask on, because talc is messy and dangerous to inhale.
Once I put the pen back together I wiped off any talc that got on the section and body, and then filled the pen with ink. To do that you just lift the lever about 4 times, keeping the lever up for a few seconds each time so that more ink can flow in. I wanted to make a post just about the restoration process; a review of the pen and how it writes will be a separate post. Here is a link to the Anderson Pens repair tools page for all the supplies you might need!

Leave a comment